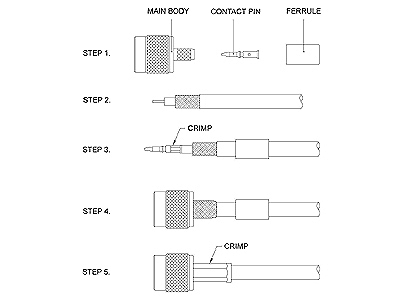
INSTRUCTIONS FOR CABLE ASSEMBLY – CRIMP/CRIMP OR SOLDER
STEP 1. Shown are different parts of the connector. Use a crimping tool to terminate all the parts.
STEP 2. First thing to do is to strip the inner conductor, dielectric, and jacket. Be sure to remove all
Burrs and break sharp edges in stripping the Cable Dims.
STEP 3. Insert inner conductor into the Contact Pin and crimp it(or solder)with the Crimp Tool as
shown. Then slide the Ferrule into the cable.
STEP 4. Insert the Body into the Braid and the dielectric.
STEP 5. Slide the Ferrule over Braid and crimp it with the Crimp tool (see illustration).


)