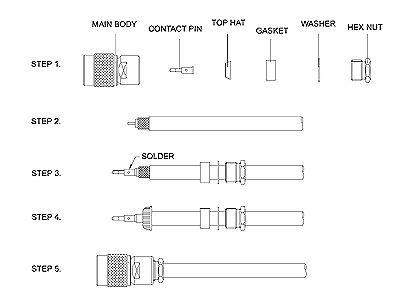
INSTRUCTIONS FOR CABLE ASSEMBLY – CLAMP/SOLDER
STEP 1. Shown are diff. parts of the connector.
STEP 2. First, strip the inner conductor, dielectric, and jacket. Be sure to remove all Burrs and break
sharp edges in stripping the Cable Dims.
STEP 3. Insert inner conductor into the Contact Pin and solder it as shown. Then slide the Hex Nut,
Washer, and Gasket onto the Cable one by one.
STEP 4. Place the Top Hat over braid and push back against cable jacket, fold back braid
wire as shown.
STEP 5. Insert cable and parts into the main body, then screw the Hex Nut until it is tightened.


)